Say hello to your new favorite quick project! This cute basket is the perfect size for binding clips, mini charm packs, or any other small notions you want to collect in your sewing room. It also makes a darling little gift basket for tiny presents (hint: Easter is coming!). Beyond that, you can use this to hold jewelry, crayons, office supplies, party favors, candy, clothespins, makeup, recipe cards, small toys -- just about anything! Best of all, you can easily sew one of these -- even two if you're quick -- under an hour.
Finished Size: 2 x 3 x 4 1/2’’
Fabric:
|
For:
|
Cutting:
|
10'' square pink kitty print
|
Exterior basket accent
|
Cut 2 strips 1 1/4 x 8’’
|
10'' square green stars print
|
Exterior basket main
|
Cut 2 rectangles 3 1/4 x 8’’
|
10'' square pink scissors print
|
Basket lining
|
Cut 2 rectangles 4 x 8’’
|
10'' square batting
|
Exterior interfacing
|
Cut 2 rectangles 4 x 8’’
|
10'' square muslin
|
Lining interfacing
|
Cut 2 rectangles 4 x 8’’
|
5’’ twill tape, 5/8’’ wide
|
Basket handles
|
Cut 2 pieces 2 1/2’’ long
|
Other supplies: adhesive basting spray
| ||
1. Sew a 1 1/4 x 8’’ accent strip along the top 8’’ edge of a main exterior rectangle and press the seam open. Fuse the wrong side of this exterior panel to a 4 x 8’’ rectangle of batting and quilt as desired. (I simply topstitched a line 1/8'' above the seam on the accent strip.) Repeat with the pieces for the other exterior panel.
2. Clip or pin the two exterior panels together with the right sides of the fabric facing each other. Make sure that the seams where the accent and main pieces meet match up on both sides. Sew all the way around three sides of the exterior panels, leaving the 8’’ sides of the accent piece open. Be sure to backstitch at the start and finish of your seam.
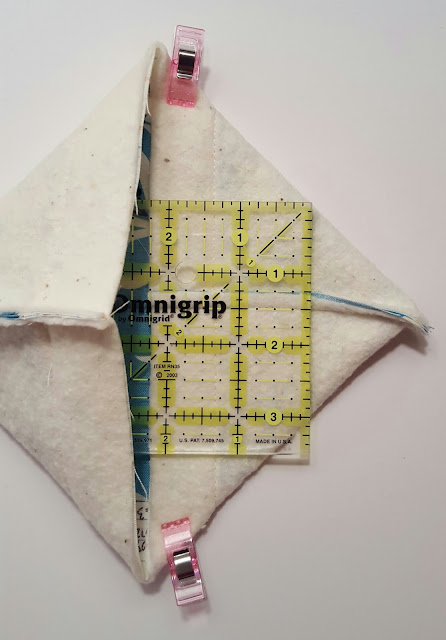
3. Box the lower corners. Push down on a side seam so that it lies directly on top of the seam on the lower edge of the main panel, creating a triangle of batting on that side. Use your ruler to measure off a 3’’ line down the side of that triangle facing the basket (the side seam should be resting at the 1 1/2'' line). Use a pencil or fabric marker to trace that 3’’ line and then use your ruler to measure and cut a 1/4’’ seam just beyond that. Check that your seams match up before stitching down that pencil line.
Repeat on the other side of the basket.
4. Turn the exterior right side out and push out the corners of the basket. Fold a piece of twill tape in half so that the short ends meet. Baste the raw ends together to form a loop. Center the loop on a side seam of the basket so that the raw ends line up with the opening and baste it on place on the exterior of the basket. Repeat with the other piece of twill tape on the other side seam.
5. Fuse the wrong side of a lining piece to a 4 x 8’’ piece of muslin using the adhesive basting spray. Repeat with the other lining panel and muslin piece.
6. Clip or pin the two lining panels together with the right sides of the fabric facing each other. Sew all the way around three sides of the exterior panels, leaving a 3’’ gap in the middle of the lower 8’’ edge and the other long side open. Be sure to backstitch at the start and finish of each seam.
7. Box the corners of the lining exactly as you did in step 3. Keep the lining turned inside out.
8. Slip the exterior inside the lining (right sides of the fabric touching) and clip or pin all the way around the top opening, being sure to match up the side seams. Sew all the way around the opening.
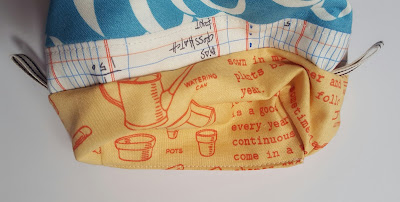
9. Pull the exterior of the basket out through the gap in the lining. Tuck the raw edges of the lining back into the gap and close it up by sewing 1/8’’ from the edge, backstitching at both ends. Push the lining down into the basket and press it carefully.
10. Topstitch 1/8’’ all the way around the opening. To give the basket a more boxy shape, press all the creases at the corners and edges.
That's it! If you make a Pixie Basket of your own,
Happy sewing!


